第一次接触oauth2得时候,是阅读阮一峰的博客。简单来讲就是一种协议或者是授权机制,我们开发常将其当成是一种框架,这种说法有失偏颇,有兴趣的可以看下阮一峰的博客讲解,这里简单讲下原理即可->https://www.ruanyifeng.com/blog/2019/04/oauth_design.html
在java开发中,常使用spring-security-oauth2框架来进行多端验证,我们可以从旧版本的源码深入浅出的看下实现原理,以及我们该如何使用它
spring-security-oauth2,我们可以将它解读为基于oauth2协议实现的spring-security。
在实现授权服务时候,参考了官网的文档翻译:
**Spring OAuth2.0 提供者实现原理:**
------
Spring OAuth2.0提供者实际上分为:
- 授权服务 Authorization Service.
- 资源服务 Resource Service.
虽然这两个提供者有时候可能存在同一个应用程序中,但在Spring Security OAuth中你可以把
他它们各自放在不同的应用上,而且你可以有多个资源服务,它们共享同一个中央授权服务。人话:授权服务我们也能看成是oauth2的服务端,资源服务我们看成是需要授权的客户端
再说一下spring官方实现的endpoint,其实开发不用细究它是什么,进去源码你可以看见是这样的
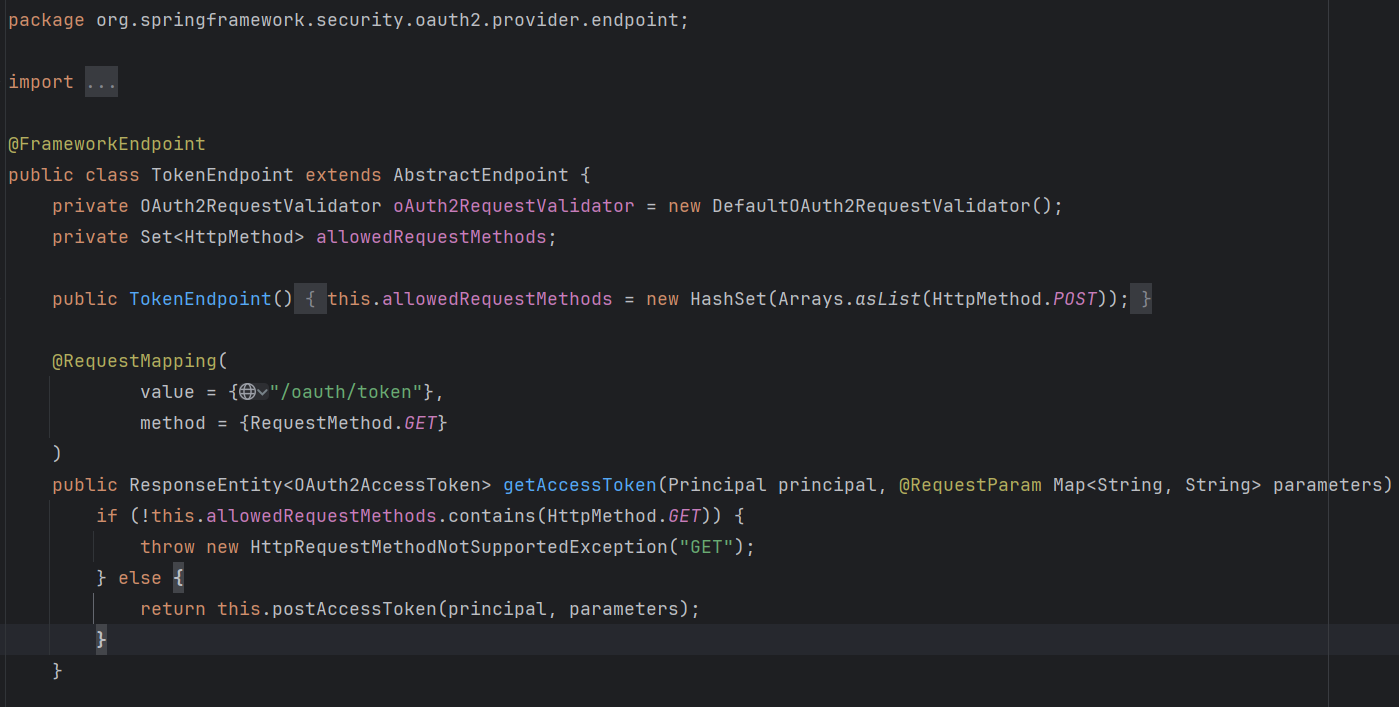
这是什么,很熟悉了,他就是controller
看下TokenStore,我们看看它是什么
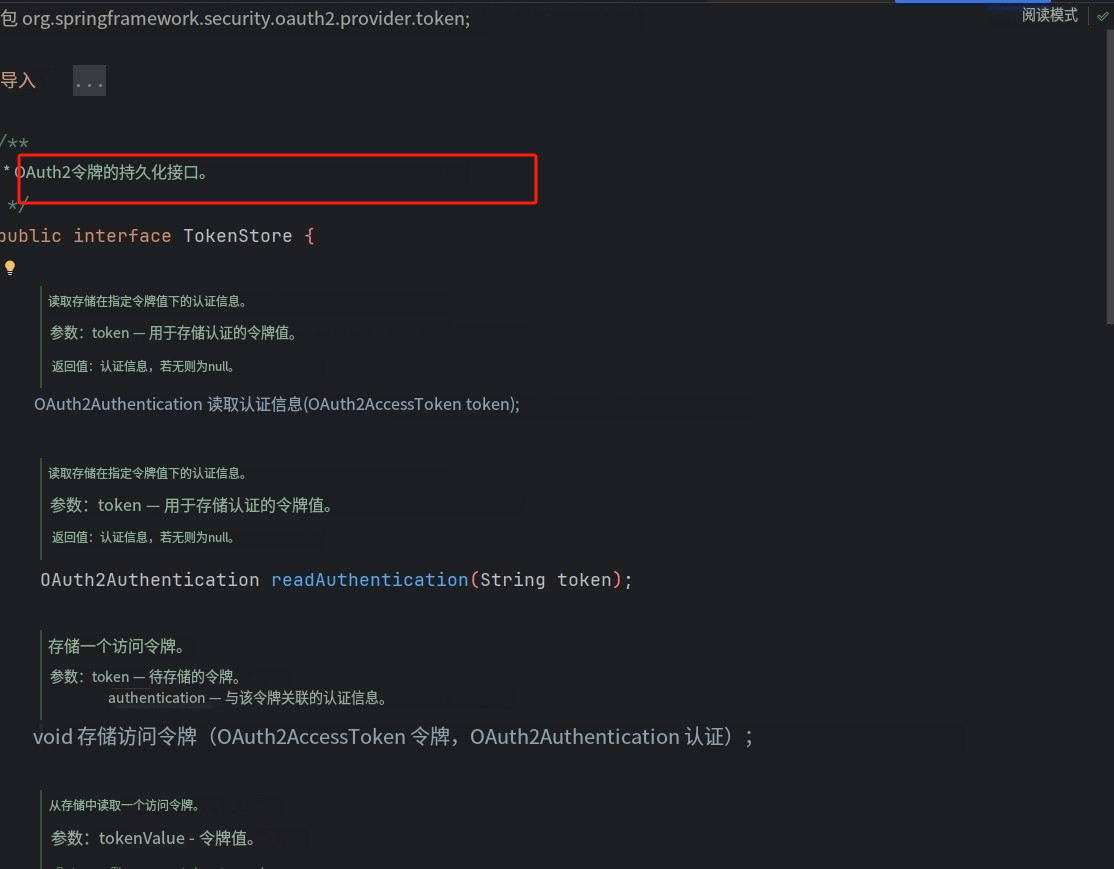
很明显了,就是存token的dao,你自己使用一种即可

默认的有以上几种形式,我们按需实现即可,最不推荐的就是InMemory类型,顾名思义用它会丢数据
那么这些都有了,我们自然而然就能想到有service
先看两个service
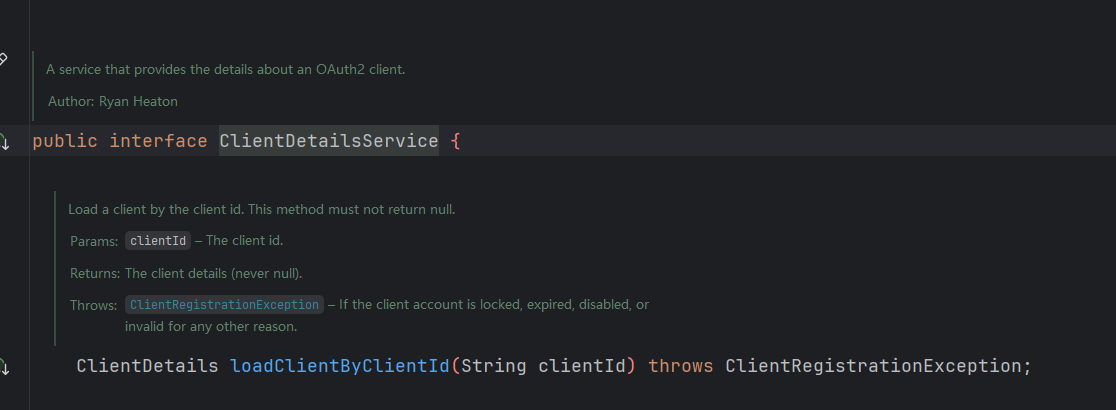
这个是客户端细节service,包括客户端的clientId跟secret,我们进来得知道你是什么客户端
默认依然两种实现,我们使用jdbc实现
看下DefaultTokenServices
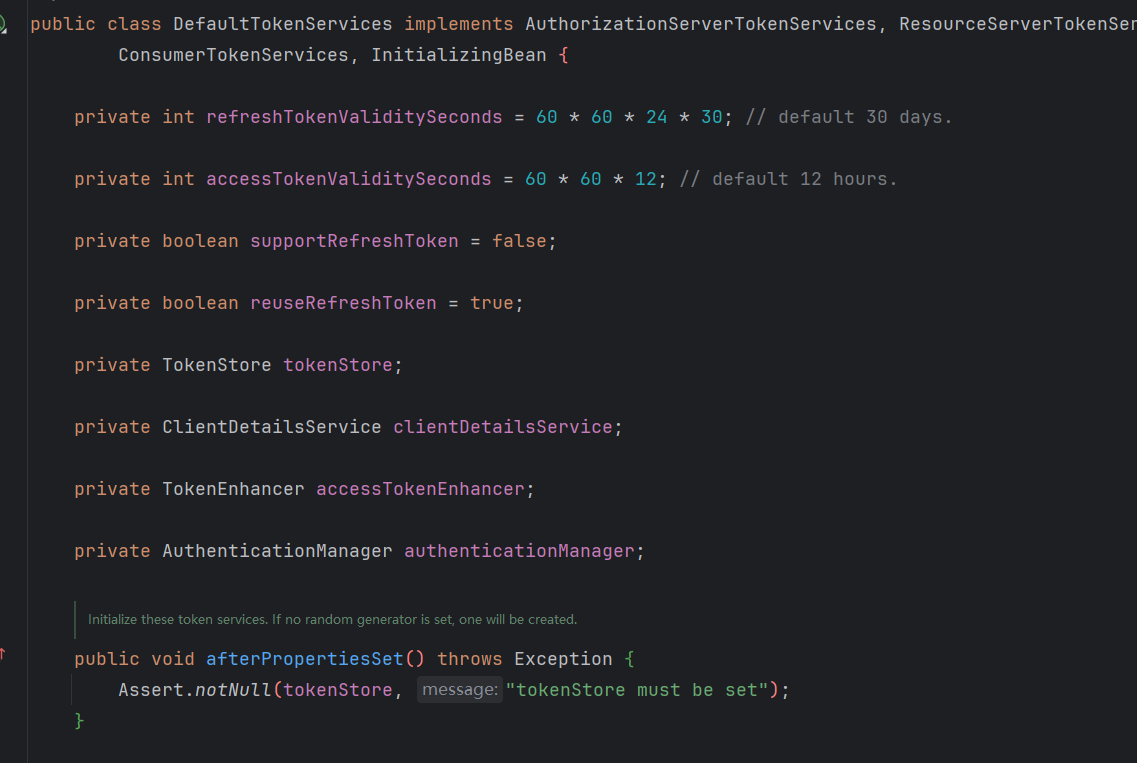
使用随机UUID值作为访问令牌和刷新令牌值的令牌服务的基本实现。自定义的主要扩展点是 TokenEnhancer,它将在生成访问和刷新令牌后但在存储之前被调用。持久性委托给 TokenStore实现,并将访问令牌定制给 TokenEnhancer。
token就是主角了,拓展点TokenEnhancer
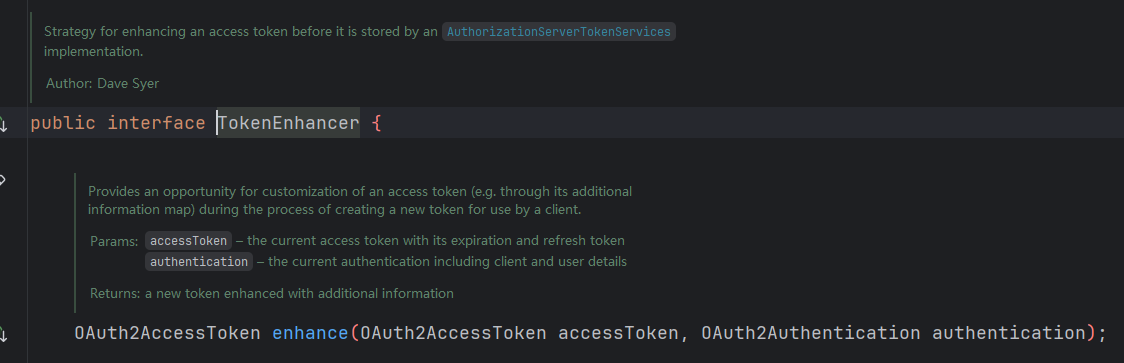
这一大堆注释,简单来说就是原来的token里面带的东西,你可以重写该方法,这样可以带更多信息进token里面,属于信息拓展点
可以参考笔者之前demo的简单实现,理解即可
    @Override
    public OAuth2AccessToken enhance(OAuth2AccessToken oAuth2AccessToken, OAuth2Authentication oAuth2Authentication) {
        //不判断会在客户端认证时获取token失败
        if(CLIENT_CREDENTIALS.equals(oAuth2Authentication.getOAuth2Request().getGrantType())){
            //注意客户端认证模式并没有账号密码 因此不追加用户信息
            return oAuth2AccessToken;
        }
        //其余三种方式都需要获取当前登录信息并追加需要的信息
        SysUser user = (SysUser)oAuth2Authentication.getUserAuthentication().getPrincipal();
        final Map<String,Object> additionalInfo = new HashMap<>(8);
        //定义客户端接受到的信息  下面可以自定义添加其他的东西 比如String类型的图片做用户头像等
        //但是注意不要放密码等安全性的东西
        additionalInfo.put("user_name",user.getUsername());
        additionalInfo.put("avatar",user.getAvatar());
        additionalInfo.put("user_id",user.getUserId());
        //向令牌中追加用户信息
        ((DefaultOAuth2AccessToken)oAuth2AccessToken).setAdditionalInformation(additionalInfo);
        return oAuth2AccessToken;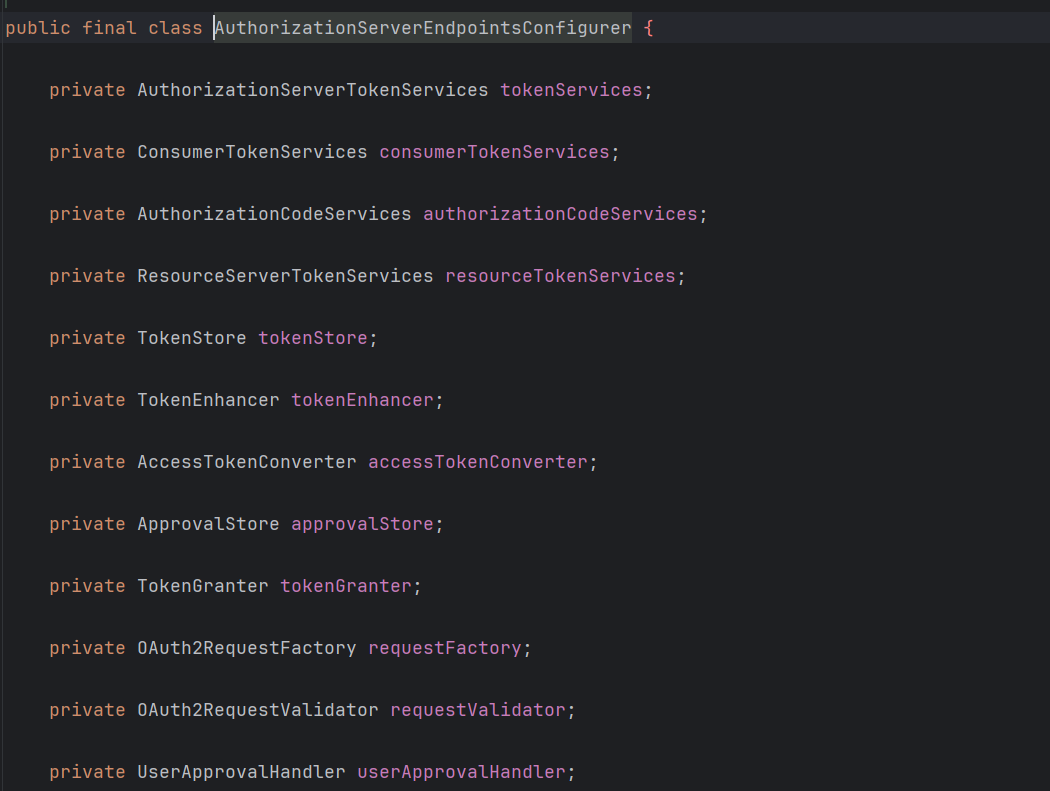
}授权是使用 AuthorizationEndpoint 这个端点来进行控制的,你能够使用 AuthorizationServerEndpointsConfigurer 这个对象的实例来进行配置(AuthorizationServerConfigurer 的一个回调配置项,见上的概述) ,如果你不进行设置的话,默认是除了资源所有者密码(password)授权类型以外,支持其余所有标准授权类型的(RFC6749)

authenticationManager:认证管理器,当你选择了资源所有者密码(password)授权类型的时候,请设置这个属性注入一个 AuthenticationManager 对象。
userDetailsService:自己一般都要实现 UserDetailsService 接口,,当你设置了这个之后,那么 "refresh_token" 即刷新令牌授权类型模式的流程中就会包含一个检查,用来确保这个账号是否仍然有效,假如说你禁用了这个账户的话。
authorizationCodeServices:这个属性是用来设置授权码服务的(即 AuthorizationCodeServices 的实例对象),主要用于 "authorization_code" 授权码类型模式。
implicitGrantService:这个属性用于设置隐式授权模式,用来管理隐式授权模式的状态。
tokenGranter:这个属性就很牛了,当你设置了这个东西(即 TokenGranter 接口实现),那么授权将会交由你来完全掌控,并且会忽略掉上面的这几个属性,这个属性一般是用作拓展用途的,即标准的四种授权模式已经满足不了你的需求的时候,才会考虑使用这个。
同时,oauth2的异常捕捉不太符合我们框架的异常捕捉,笔者的异常捕捉大家也可以参考一下
private Map<String, Object> data = new HashMap<>();
@Override
public ResponseEntity<OAuth2Exception> translate(Exception e) {
data.put("status", -1);
data.put("data", null);
// 账号错误
if(e instanceof InternalAuthenticationServiceException)
{
data.put("code", 10001);
data.put("message", "账号错误!");
}
// 密码错误
else if(e instanceof InvalidGrantException)
{
//可以通过e.getMessage调取异常信息进一步细化
data.put("code", 10002);
data.put("message", "密码错误!");
}
// 没有携带 grant_type
else if(e instanceof InvalidRequestException)
{
data.put("code", 10003);
data.put("message", "未携带grant_type!");
}
//不支持的grant_type
else if(e instanceof UnsupportedGrantTypeException){
data.put("code",10004);
data.put("message","不支持的grant_type!");
}
//错误的token
else if(e instanceof InvalidTokenException || e instanceof InvalidAccessException){
data.put("code",10005);
data.put("message","错误的token!");
}
//错误的范围
else if(e instanceof InvalidScopeException){
data.put("code",10006);
data.put("message","错误的scope!");
}
//错误的client
else if(e instanceof InvalidClientException){
data.put("code",10007);
data.put("message","错误的client!");
}
//token已过期
else if(e instanceof InsufficientAuthenticationException){
data.put("code",10010);
data.put("message","token已过期!");
}
else if(e instanceof UsernameNotFoundException){
data.put("code",10011);
data.put("message","用户名不存在!");
}
// 其他错误
else
{
System.err.println("错误原因"+e.getMessage()+e.getClass());
data.put("code", 10008);
data.put("message", "其他错误,请联系管理员!");
}
return new ResponseEntity<>(valueOf(data), HttpStatus.BAD_REQUEST);
}
public static OAuth2Exception valueOf(Map<String, Object> errorParams) {
OAuth2Exception ex = new OAuth2Exception("BAD_REQUEST");
Set<Map.Entry<String, Object>> entries = errorParams.entrySet();
for (Map.Entry<String, Object> entry : entries) {
String key = entry.getKey();
ex.addAdditionalInformation(key, entry.getValue()+"");
}
return ex;
}OAuth 2.0 规定了四种获得令牌的流程。你可以选择最适合自己的那一种,向第三方应用颁发令牌。下面就是这四种授权方式。
授权码(authorization-code)
隐藏式(implicit)
密码式(password):
客户端凭证(client credentials)
/*
        **==//授权码模式\\==** authorization_code
    先访问以下页面 通过账号密码登录选择权限给与授权码
    http://localhost:8087/oauth/authorize?client_id=client1&client_secret=123456&response_type=code&redirect_uri=http://www.baidu.com
    在重定向页面 这里是百度 uri后面获得授权码
    使用postman请求接口
    post请求
    http://localhost:8087/oauth/token
    body里面使用x-www-form-urlencoded或者form-data
    grant_type:authorization_code
    code:H_5327(这里要用自己的授权码)
    redirect_uri:http://www.baidu.com
    client_id:client1
    client_secret:123456
    请求后即可获得
    {
    "access_token": "LRXqK/btDWfC4CF+c0CH+zRzZ/A=",
    "token_type": "bearer",
    "refresh_token": "8Q9eemJ/LseJfipvQ0hlTlI3Xvo=",
    "expires_in": 3599,
    "scope": "app"
    }
 */
/*
    **==//凭证模式\\==** client_credentials
    使用postman请求接口 请求方式为post
    http://localhost:8087/oauth/token
    body里面使用x-www-form-urlencoded或者form-data
    client_id:client1
    grant_type:client_credentials
    redirect_uri:http://www.baidu.com
    client_secret:123456
    请求后会获得
    {
    "access_token": "1J+KpQp9MLz1/2PuuWd/5t8GMe0=",
    "token_type": "bearer",
    "expires_in": 3599,
    "scope": "app"
    }
    该模式并不支持refresh_token
 */
    /*
      **==//密码认证模式\\==**  password
    使用postman请求接口 请求方式为post
    http://localhost:8087/oauth/token
    body里面使用x-www-form-urlencoded或者form-data
     client_id:client1
    grant_type:password
    redirect_uri:密码模式不需要它
    client_secret:123456
    username:admin
    password:admin123
    请求后可获得
    {
    "access_token": "LRXqK/btDWfC4CF+c0CH+zRzZ/A=",
    "token_type": "bearer",
    "refresh_token": "8Q9eemJ/LseJfipvQ0hlTlI3Xvo=",
    "expires_in": 1743,
    "scope": "app"
    }
 */
/*
    **==//隐式授权\\==** implicit
    get请求 可直接在浏览器中请求
    http://localhost:8087/oauth/authorize?client_id=client1&client_secret=123456&response_type=token&redirect_uri=http://www.baidu.com
    在隐式请求中 它与认证码请求的差别为认证码response_type=code  隐式请求 response_type=token
    而且认证码比它来讲相对安全很多 隐式认证的token信息会重定向到重定向的url后面
    隐式授权 不支持refreshToken 有需要可以自定义刷新规则
    重定向结果
    https://www.baidu.com/#access_token=LRXqK/btDWfC4CF+c0CH+zRzZ/A=&token_type=bearer&expires_in=1030&scope=app
 */
/*
    **==//刷新token\\==** refresh_token
    post请求 用postman模拟接口
    http://localhost:8087/oauth/token
     body里面使用x-www-form-urlencoded或者form-data
     client_id:client1
     grant_type:refresh_token
     client_secret:123456
     refresh_token:hjaR7VWZzN2WeHOTJidnGEU9iGM=
    刷新结果:
     {
    "access_token": "G3cS1APOwsO5xgmRTjlnw64XgN8=",
    "token_type": "bearer",
    "refresh_token": "hjaR7VWZzN2WeHOTJidnGEU9iGM=",
    "expires_in": 3599,
    "scope": "app"
    }
 */
这里就不多赘述spring-security的其余内容了 以oauth2实现为主.后续可能会出一篇spring-security的文档
